
Scanning family photos is essential. No matter how good your storage conditions, photographs deteriorate over time, not to mention the risk of a flood or a fire destroying them in an instant.
However, even though photo scanning seems like a relatively straightforward task, there are actually quite a few mistakes that can quickly derail the entire process.
So, to help ensure that you achieve the best results you can and that you can enjoy your digitized photo collection forever, let’s look at some of the most common mistakes that you should avoid.
Ready to get started? Then read on below.
Scanning Dirty Photos
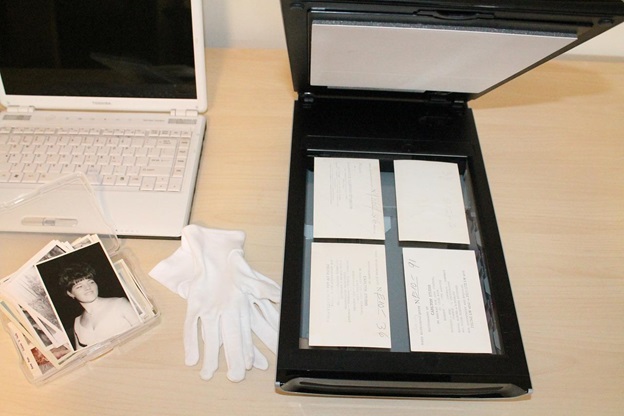
Most people are so eager to start the scanning process that they forget an essential fact – most old photos will likely have quite a lot of debris on them. As pictures are usually kept in albums or boxes, they will accumulate dust, debris, and even dirt, which will need to be manually removed beforehand.
After all, if your photo is not clean, then any chance of them looking good in a digital format goes out the window in an instance. So, use a cloth to carefully remove any debris and only touch the photos with clean and not oily hands.
Not Cleaning the Scanner
Just as the photos themselves have to be clean, so does the scanner. Whether it’s dust or anything else, any imperfections will be clearly visible on the images, so make sure that you look at the condition of your scanner before getting started.
Even though the cleaning tasks might not be the most exciting part of the scanning process, it’s still essential and is used by all good picture scanning service providers.
Not Picking the Right Resolution
Another common mistake that people make is not picking the right resolution of their images. While you may be tempted to use the highest DPI count possible, remember that it will make the images very large, which can become a problem when you’re storing thousands of photos.
For most family photos, around 400 DPI will be more than enough, although if you’re working with slides, you may need to increase that number to as much as 1500 DPI.
Not Cropping the Photos
A simple yet annoying mistake that many people make is not cropping the photos before scanning.
Many scanners allow cropping the previewed image, which will enable you to remove the background and ensure that the saved file only contains the actual image and no white background from the scanner itself.
Luckily, this step is effortless and will only take a couple of seconds to complete once you figure it out.
Tampering Before Scanning
Some scanners will allow you to make minor edits to the photo before it gets scanned. However, you should avoid using these methods as they usually leave the image looking worse than before.
Ideally, you should keep the image in its original appearance during the scan. That way, you can use the advanced tools that are available to work on the image once it’s digitized.
Selecting the Wrong Format
The format in which you save the photo will largely depend on what you want to do with the digitized images.
If you want to retain every detail of the photograph and be able to edit it later on, you should opt for a TIFF format. However, as mentioned before, higher quality means larger files, so you should weigh the pros and cons of that option.
If you only plan to just view the images, a regular JPEG format might be much more convenient for yourself and for sharing with the family online.
Not Naming the Photos
When you’re working with hundreds of images, you might be tempted to just leave the randomly generated names and move on to the next one.
However, once you find yourself with hundreds of random-numbered image files, you will regret your decision.
You should try to name your photos immediately so that you know what they contain and can quickly find what you’re looking for.
Failing to Group the Photos
Grouping the photos is another essential part of the process if you actually want to enjoy browsing your newly-digitized collection. Without a convenient way to group and categorize the images, you will be left with looking at them randomly, which isn’t very fun.
For instance, if you want to retrieve a specific photo of a family member, having to go through hundreds of images can quickly become discouraging.
Meanwhile, if you catalog and categorize your collection, you won’t have to worry about that, and can quickly find even a single image from an extensive list.
Not Removing Imperfections
Earlier in the article, we talked about how editing the images before scanning wasn’t a good idea. Still, that doesn’t mean that your photos won’t require any attention later.
Once you have the scanned images, you will likely find that at least some of them don’t look good. In these situations, you should use Photoshop to manually edit the photos, applying effects, and retouching to make them look better.
While the process can take time, having beautifully-looking images will make them much more enjoyable and allow you to share them on social media or with family members.
Not Consulting With Professionals
As you’ve probably gathered from the list above, the process of scanning family photos is by no means easy. In fact, achieving a result that you can be happy with is usually a skill that requires quite a lot of trial and error.
Because of that, you might find that opting for a professional photo scanning service is a much savvier choice.
You not only avoid spending hours upon hours on a tedious project but can also rest assured that your photos will be scanned by experienced specialists that use cutting-edge equipment you might not have access to.
What’s more, companies with experience with photo digitization or VHS to DVD service will be able to edit your photos, enhance their looks, and provide you with the best results possible.
